Talking about shaving the Nikon always reminds me of a lunch I had with friends one Sunday afternoon. We were eating bread rolls with meat & salad when I happened to read the label for the ham. It read ‘Lightly Shaved Hungarian’ which none of us had heard of, so I pronounced, “I’ll have a lightly shaved Hungarian please, my favourite kind!” We all cracked up laughing, my wife included. Not funny? I guess you had to be there 
All joking aside, shaving the hood off the Nikon 10.5mm is a serious although not too difficult process. If you’re not certain you want it shaved, turn back now as you can’t glue the hood back on later. Although you could have it repaired with a new one, at considerable expense I expect. In fact talking with NPS Australia (Nikon Professional Services) at a motor race I heard the best example of a shaved 10.5mm they’d ever seen was one done ‘professionally’. According to them a gentleman bought a 10.5mm and a hood as a spare part. He had the spare part hood cut perfectly, then had Nikon install the cut hood onto his new 10.5mm. I’m told the result looked like it came from the factory. The other end of the scale looked more like a dog had ripped the hood off with it’s teeth 
The method I’m about to describe will provide a good (although not factory) finish, and require about $6 worth of tools from your local hardware store. It requires no workshop or other gear, and I actually performed the procedure while staying at a hotel in Sydney.
Required Tools:
1) Small hacksaw, with very fine teeth that have no warped pattern, ie the teeth run perfectly straight. The example shown here cost me Aud $4.95 at the local Bunnings hardware store. I looked for an extra blade, but all the examples they had contained the warped pattern in the teeth which I didn’t want. I should have just bought 2 hacksaws, but I was too cheap. (Note: you don’t need ‘the’ hacksaw I’m showing, any hacksaw will do the job, but a small one does give you more control, and feel as you cut through the plastic.)
2) Electrical tape.
3) Pencil.
4) Sheet of paper.
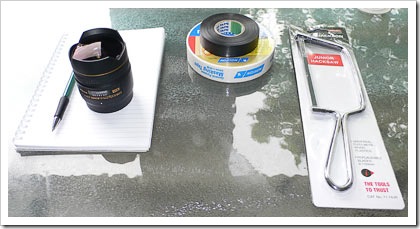
This image also shows masking tape which I didn’t end up using.
Procedure:
Step 1
Figure the point at which you will cut the hood off. I chose just under the lowest point of the hood petals.
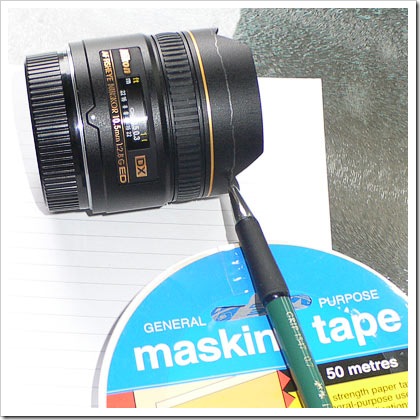
Elevate the pencil a little (I did use the masking tape after all) and rotate the lens while holding the pencil against the hood. This will mark out your cut line. It will be rough, but don’t worry, we’ll deal with that in the next step.
Step 2
Using the electrical tape, mask the bottom of the line drawn in step 1. Be sure not to cover the line. Run the tape around the lens 5-6 times to build up some depth of tape. We’ll use the ledge created as a guide for the hacksaw.
Step 3
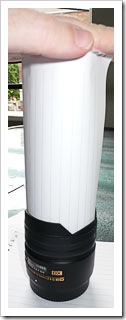
Cut a piece of paper to the approximate circumference of the lens, roll it in a circle and slide it between the lens & the hood. I jammed it in quite tightly (as shown in this photo), this is not necessary and will likely leave you with a few bits of paper stuck in there when you remove it later.
Step 4
Tape the top of the pencil line, which will also cover the paper and hold it in place. Be sure to leave just enough gap between the 2 rows of tape for the hacksaw blade to comfortably slide. You’ve now created a channel for the blade to sit in, reducing the chance of blade slip or cutting at the wrong angle.
Step 5
Now for the fun bit… start cutting. I went deep first to find out how much I needed to cut before I hit metal. I then worked my way around the barrel, cutting each section to the metal before moving on. You can feel when you are through the plastic & cutting the metal… it’s a VERY different feeling on the hacksaw. You can also see the white paper through the cut… assuming you haven’t removed the paper already with your blade.
My blade became quite blunt 1/2 way though. This didn’t cause any issue with the cut, but certainly increased the cutting time. I spent about 20mins carefully cutting.
I have seen a shaving tutorial that used a coke can cut up (ie very thin metal) instead of paper between the lens & hood. This would be better, but I didn’t have the tools or time to muck around with it. In the end the metal barrel of my 10.5 has a few small scratches on it, which don’t bother me at all.
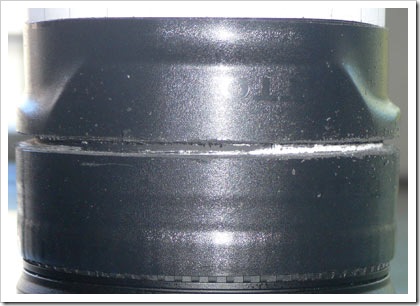
In this image I have basically cut through the entire lens hood. You can see the paper through the cut in may places. You may also make out the few bits of scratched metal where I’ve taken the black paint off the lens barrel.
Step 6
Gently remove the hood once you’re sure you have cut through all the way around. You’ll see a result like this. I had a few tiny bits of paper stuck in the lens barrel, if you don’t jam the paper in hard you shouldn’t have the same problem.
The Final Look.
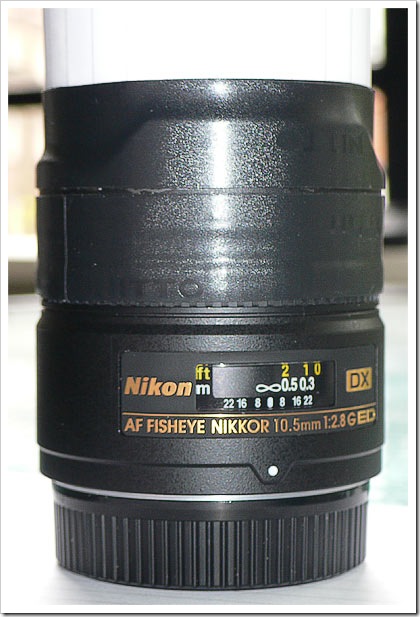
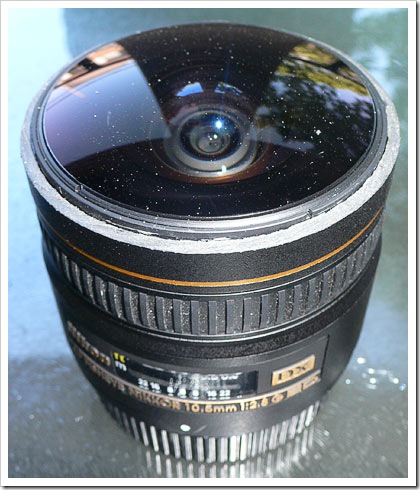
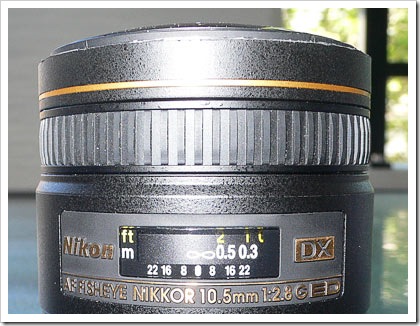
When finished I realised I could have made my cut line a millimetre or 2 higher, ie right on the corner of the hood petals, rather than under them. The lens works perfectly.
Here’s a quick overview of my shooting method from the Panoguide forum:
G’day,
There’s been heaps of great comments already. I’ll just state for the record owning a D200 & D700 what I do.D700 + Nikon 16mm Fullframe Fisheye = heaven 😉 Same FOV as D200 + 10.5mm requires 6 + 1 etc.
I have shaved my 10.5 and also use it on the D700 for pole shots shooting 3 around at 0 degrees on a 360precision Atome. The Atome has a ring which attaches to the lens, and acts as a quick release, so I leave it on the 10.5mm at all times. Works beautifully.
I’ll give Han’s recommendation a go and try 4 shots around as well… I did find with 3 shots auto CP generation wasn’t brilliant. Here’s 18 pole shot examples I did at a motor race in October: with D700 + shaved 10.5mm + 360P Atome + pole/rotator etc.
http://embed.panedia.com/maplet?map=fpznjpzr
D700 has ‘auto’ DX mode when a DX lens is attached. Like the D3, that can be turned off in the menu.
There is no problems having the hood off the 10.5mm. Just need to be a bit careful not to bang it on anything as there is no protection for the lens. Also, as with any lens you’re shooting panos with, the focus should be taped down so it doesn’t ever move.
Thanks, Aaron Spence
panedia.com
Other Shaving Tutorials
http://michel.thoby.free.fr/Adaptateur_EOS_Nikon/Sawing-off_the_sun-shield.html
http://www.360pano.de/en/tokina-sigma-nikon.html – Great demonstration of the view before and after shaving the Tokina 10 – 17mm fisheye zoom. Tobias will do a professional job shaving your lens for 50 Euro + shipping. Contact him at the site linked for more info.
There are more around… I’ll add more when I find them again, or if listed in the comments.



thnks so much Aaron .. i hv a 10 – 17 tokina fish eye .. and even i did it .. thnks to the above tutorial … thnks a ton … regards .. Humayun
G’day Manjesh,
I gather you’re using a crop sensor camera 1.5x crop (D90, D7000, D5100, D3200 etc) rather than full frame camera? (D700, D3, D800 etc) If so shaving the hood unfortunately makes no difference, as the hood is designed for 1.5x crop cameras. It’s only if you use the lens on a FullFrame camera that shaving the hood increases the angle of view.
Sorry for the bad news.
I shaved hoods but image comes like before please tell me what can i do to increase image angle????
Hi! I’m surprised nobody suggest taking off the hood before sawing on it! It’ is quite easy, and just requires some dismantling og the lens. Just the mount, and other mechanics, NO dismantling of the optical assembly! For me, it’s feels much safer sawing on the hood away from the lens!!!
And the Samyang 8mm is shaved too:
http://www.360pano.de/en/tokina-sigma-nikon.html#samyang
great tutorial tanx !!!
Great tutorial, good pictures and information. I´ll got to try this, too.
thanks, Marcus
I was so scared, but I’ve done it too.
It was quite easy, and it’s definitely true that you feel a different noise when you reach the metal.
Thanks
For marking the cut line try standing the lens on the hood
( i.e. vertically ) and finding an item of suitable thickness that would align the marker with the cut line. It would yield a more accurate line. You are a brave soul, as I cringe at the thought! After writing this I looked at the post above and saw they had exactly the same idea!
The Tokina 10-17 is a tougher piece of work. The sun hood is all metal.
Thanks Guys, we had an interesting addition on the panotoolsNG forum, a better method for scribing the pencil line. The description is a little long so I’ll just post a link:
http://tech.groups.yahoo.com/group/PanoToolsNG/message/26192
I didn’t have the gear handy to do this, and it’s not critical, but you may decide you’d like a more accurate line
Aaron
Excellent tutorial, the paper roll gives a huge improvement over DH’s method.
Thanks
JL
Nice tutorial. I did mine some time ago and I did just about the same procedure that you did. I must admit that I was a little hesitant at first, but it is not as hard as one may think.
Thanks for your time putting this together,
Jim